Your new website is live! Exciting right? I bet you want to share it with everyone and show it off. But you should probably wait a little. Announcing your new website can backfire if everything isn’t ready for sharing. Just because you can see the new website, doesn’t mean everyone can. The last thing you want is for all the comments on your new website announcement to be full of complaints and issues. How embarrassing that would be!
Here are reasons to wait, and a checklist of items to review for before making your new website announcement.
1. Wait For DNS Propagation
When you launch a website, there’s a good chance that your site may have changed to a new server or hosting provider. When this happens, your web person will tell your domain name (example.com) to point to your new server. This is usually done by setting a A Records, CNAME Records, or changing your nameservers. If that doesn’t make sense to you, that’s OK. What you need to know is that it can take up to 48 hours for these changes to propagate across the internet.
These records are like a map that tell your computer where on the internet to find the website. Until full dns propagation happens, there is a chance that someone who tries to visit your website will be directed to your old host (your old server) instead of the new one (they will still be using the old map).
There are several websites where you can check the status of DNS propagation. https://www.whatsmydns.net/#A is a great example. It will show you where various servers across the world think your website is. It doesn’t check every server, so we still recommend waiting the full 48 hours.
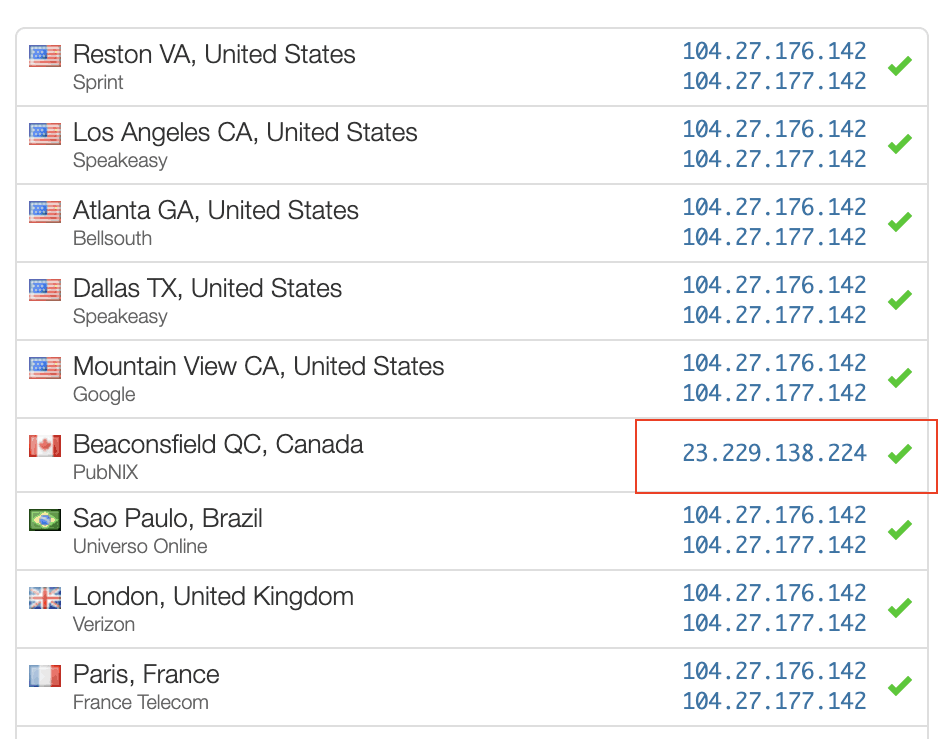
Additionally, a user’s home network or internet service provider could be caching the old server’s IP address, and may not update their “map” to where the new website is located for up to 48 hours.
2. Check Your Redirects
It can take a while for search engines to pickup your new website, and the content changes of your new website. In fact, it can take weeks to months before google realizes there have been changes.
Until Google picks up your new content, links to your old pages will still appear in search engine results. If users click these links they will end up with a 404 Error and see “page not found” when they click through to your website.
Instead of waiting for Google to find your new pages, you can create redirects. Creating Redirects is a step that many web developers forget about. Essentially, for every page on your old website, you have to redirect that URL to the equivelent page on your new website. For example, your old website may have had the URL www.example.com/about-us and your new website might have www.example.com/about.
To make sure your visitors don’t get a 404 page not found error, you can create a 301 redirect (an indication that the URL has permanently changed) so that all traffic to /about-us will be automatically forwarded to /about.
This is critical for anyone who ends up “googling” your website instead of clicking an announcement link.
3. Check Your Meta Tags
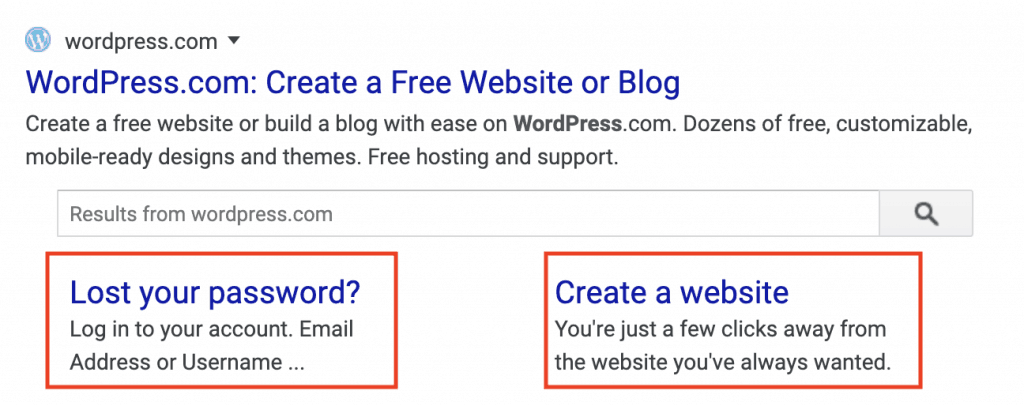
Do all of your pages include title and meta description tags? These tags are critical when sharing your website. Social media feeds use these tags to generate link previews. The title tag also shows in your browser’s tab. If these tags have not been specified they may default to nothing. The social platform may also pull content from your page that doesn’t make sense.
WordPress SEO plugins like Yoast and The SEO Framework can handle a lot of this automatically, but it is still a good idea to manually check these tags, and specify your own title and description when automatically generated tags are not optimal. We recommend always manually specifying tags for your homepage, and any blog posts, as those are the most frequently shared.
4. Check Your Social Sharing Previews & OG:Image Tag
Chances are you’ll be announcing your new website on a social media platform. Virtually all social platforms use the image specified in the og:image tag for the link preview. If you do not have an og:image specified, the social network will try to select an image from your page automatically. Frequently, the results of this are not great.
Your website should always have a specified og:image for the optimal display on social networks.
Testing Social Previews
The best way to test how your website announcement’s social media preview will look is to use the Facebook Social Debugging Tool. This allows you to “re-scrape” your site’s tags if you publish updates or changes. The first time you share your site, the social network will save what it finds for the link preview. It may take days or weeks before it decides to check and see if there have been any changes. The debugger tool allows you to force Facebook to fetch new og:image, title, and description tags so you can immediately see how updates to your social preview will look.

Tip: Create your og:image to be 1200×630 pixels. This is the optimal size for Facebook. Ensure text is large enough to be legible. Avoid putting critical parts of the image near the edges, as they may get cropped on certain devices or on other social platforms.
5. Check In Multiple Browsers And Devices
It used to be you had to double check your website in Internet Explorer (IE) to make sure it worked correctly. IE was notorious for displaying things improperly. Typically developers had to create special style code just for that browser. People generally do not use internet explorer anymore. Most of the largest websites on the internet have dropped support for it.
With Windows 10 and the latest versions of MacOS, your web browser is updated automatically to the latest version. This is true for Google Chrome, Safari, Microsoft Edge, and Firefox – the 4 most popular web browsers on desktop. There are almost never display inconsistencies among these browsers, but it still happens.
Safari and especially Safari on iOS are most likely to display elements of your website inconsistently. It pays to test your website on a real device with these browsers installed. We have frequently found inconsistencies between how Browserstack versions of Safari display webpages compared to real devices.
6. Check In Multiple Screen Sizes
When reviewing each page of your website, grab the edge of your browser window and resize it from full width to around 320px wide, or as narrow as Chrome will allow. Every element on your page should remain clearly readable, nothing should break. You cannot predict what type of device your users will be viewing the site on. Phones, tablets, and computer screens range in size from 3.5 inches to over 40 inches. Your website should be beautiful on any screen.
7. Check The Download Size, Number Of Requests, And Load Speed
This section is long, but very important.
Did your developer remember to optimize the download size of your website? This is the amount of data that is transferred from your web host to the user’s device. These days it’s pretty easy for a website, even when full of large beautiful images, to be less than 3MB on initial load – if any time has been put into speed optimization. This size should be even smaller on mobile devices, as your site should be coded to serve smaller images optimized for smaller screens like phones. Additionally, your site’s resources should be optimized to avoid a large number of requests. Frequently an unoptimized site will make over 150 requests just to download one webpage.
The quality of your web host can greatly impact the loading speed of even the highly speed optimized sites. Frequently, budget web hosts will place you on a server with hundreds of other websites which may be hogging resources. If you host with RIDEOUT, your site will live on its own server with dedicated resources. You’ll never have to worry about another website hogging resources and slowing down your site or hurting your SEO.
Use Chrome’s Built-In Developer Tools
Google Chrome has built in developer tools that allow you to see how much data your site uses when it loads. Selecting the “Network” tab will let you see all of the measurable metrics related to the loading speed of your website.

Desktop Targets
You can use the following measures as targets to try and meet or exceed on a typical high-speed internet connection.
- Number of requests: Less than 50
- Resources: Less than 3.0MB
- DOMContentLoaded: Less than 2 seconds
Mobile Targets
You can use the following measures as targets to try and meet or exceed on a typical fast 3G cell phone with good connection (yes, it’s still really common for people to have a 3G connection, or a poor 4G connection that is similar in speed to 3G). You can test this in Chrome Dev Tools by toggling the device toolbar and selecting an iPhone for screen size, and setting throttling to Fast 3G. If you can beat these on Fast 3G, your site will load very fast for 4G users.
- Number of requests: Less than 50
- Resources: Less than 2.5MB
- DOMContentLoaded: Less than 3.5 seconds
Your site can be coded to load mobile optimized assets for smaller screens, reducing the amount of data the device needs to download.
DOMContentLoaded is the time it takes for your website to appear to a user. This is the most important speed metric because once this is done, the user can see your page’s content. The full “Load” time may be longer because your site may be transferring additional data in the background after the page initially becomes visible and usable to the user.
WordPress Plugins For Speed Optimization
WordPress has many plugins available to help optimize the speed of your website. They typically work by aggregating resources to reduce the total number of requests (Autoptimize), automatically creating mobile versions of your images, and converting them to more efficient image formats (Short Pixel), or compressing and creating static versions of your pages and resources (avoiding time consuming and slow database reads) (WP Fastest Cache).
Consider a CDN For National / International Speed
If you are only serving a local market, it can be a good idea to host your website on a server physically close to that market (east coast vs. west coast). For national and international audiences, a content delivery network (CDN) will push your website out to a distributed network of servers covering the globe. Your user’s web browser will automatically load the website from the server closest to them. This way your user won’t have to wait for the data to cross the country or the ocean before loading. This can shave seconds off loading speeds for distant users, especially if the data would otherwise need to cross undersea cables.
Popular CDN’s include cloudflare, Stackpath, and Bunny CDN.
8. Check Your SSL Certificate & Site Security
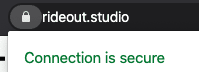
Web browsers will now mark sites without an SSL certificate as unsafe. Not only should you see the https:// next to your domain name in your browser bar, the following should also be true
- Verification that the connection is secure when clicking the “lock” icon in Chrome. If this is not labeled, it’s possible that certain parts of your website are still loading over an insecure connection.
- If you browse the plain old http:// version of your website (try removing the “s” and visiting your site), it should automatically redirect immediately to the https:// version.
Having a properly functioning SSL certificate is important to your visitor’s security, and to your website’s search engine optimization.
Pro Tip: SSL Certificates Are Free And Automatic Now
No one should ever try and charge you for a standard SSL certificate, nor should you need to be reminded to renew, or pay someone to renew it for you. Your web host should be using Let’s Encrypt to automatically generate and renew your SSL certificate for free.
Only larger enterprise organizations really need to worry about customizing their SSL certificates. Otherwise, there is no security advantage to paying for one.
9. Check www and non-www Links To Your Site
Many people assume that they should type www. before any website domain name. Others never add the www. It’s important to ensure that your website works whether your users either include or do not include the www. Typically, you should choose one, and automatically redirect from one to the other.
There is no SEO impact on using www. Chrome web browser will automatically hide the www. if you use it.
Bonus: Run A Lighthouse Audit

If you want a plain, easy to understand benchmark for your website’s speed, you can run a Lighthouse Audit. This is available in Chrome Dev Tools, it’s built in.
- Navigate to the “Audits” tab
- Check Performance, Best Practices, Accessibility, and SEO
- Use simulated slow 4g
- Check clear storage
- And click Run Audit
If any of your scores are less than 50, you probably have a few major issues to take care of. If your scores are above 70, you’re doing good. You should strive for over 90 on the SEO score and the Accessibility score. Many times it’s even practical to reach 100% on these. Sometimes your score suffers slightly from technicalities that are not relevant in the real world.
Unless you have a completely custom coded website, it can be difficult to score above 90 for Performance and Best Practices metrics. Don’t obsess too much over these scores, use the audit to identify blatant problems and fix what makes sense. Chasing optimizations above 90 can cost more than it’s worth. It’s also possible to hack your way to a higher score while actually making the user’s experience worse.
Need Help?
RIDEOUT can run your website through this checklist even if it was built by someone else. And of course, we run all of the websites we build through this checklist as well.
We can also check your website on a monthly basis to ensure it continues to perform well as changes and updates are made.
Contact Us to learn more.